
How to Weave a Mug Rug on a Frame Loom: A Beginner's Step-by-Step Guide
Updated: Aug 31
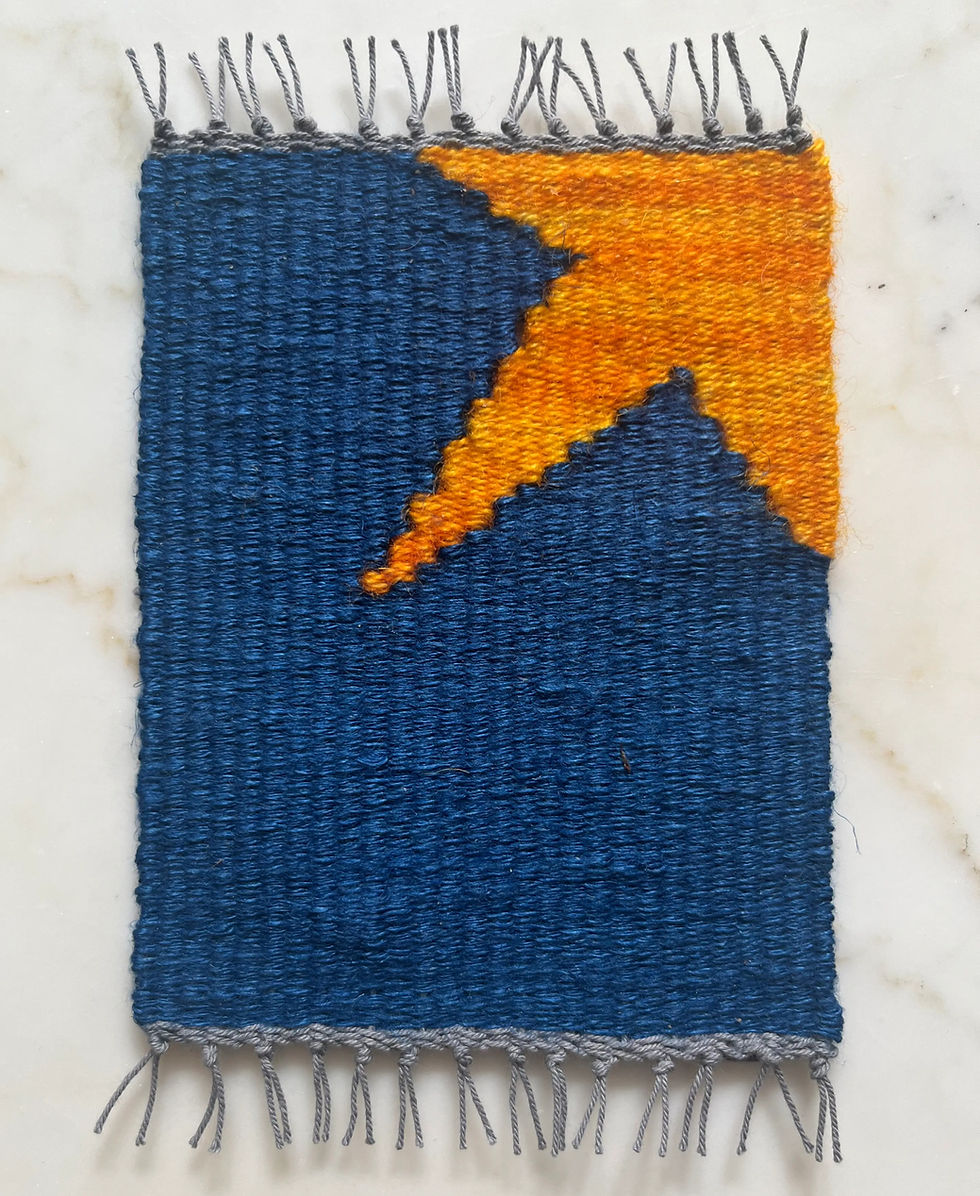
A mug rug is a small woven mat, roughly 13–18 cm × 10–15 cm, sized to hold a mug plus a cookie or two — bigger than a coaster, smaller than a placemat. On a frame loom, it's one of the best first or second projects you can make: small enough to finish in an afternoon, but big enough to combine plain weave with soumak or rya for a genuinely finished-looking piece. If you've already tried plain weave, this is the project where everything starts to click together.
This guide walks through sizing, materials, the step-by-step weave, the mistakes almost every beginner makes, and how to look after the finished piece.

What Is a Mug Rug, and How Is It Different From a Coaster?
A coaster is sized just for the base of a cup — typically around 10 cm square. A mug rug is deliberately larger, leaving room for a mug and a small snack, with finished sizes usually landing somewhere between 13 × 10 cm and 18 × 15 cm.
If you've come across "mug rug" before, it was probably in a quilting context. Most mug rug patterns online are mini quilts made from fabric scraps. Weaving one on a frame loom produces the same useful object through a completely different process: instead of piecing fabric, you're building the surface thread by thread, which makes it a natural project for testing yarn combinations or techniques in miniature.
What You'll Need
Category | What it is | Notes |
Frame loom | Holds the warp under tension | A loom around 24x18cm works well for one mug rug |
Warp thread | The fixed vertical threads | Cotton rug warp or cotton seine twine, strong with minimal stretch |
Weft yarn | The yarn you weave across | Cotton for a flatter result, wool/rug wool for a denser one, or fabric strips for a stash-busting option |
Tapestry needle | Carries the weft across the warp | Included in our Frame Loom No.1 |
Comb or fork | Beats the weft down for an even fabric | |
Scissors | For trimming ends and fringe |
See our frame loom, which includes tapestry needle, and our weaving comb.
What Size Should You Weave a Mug Rug?
Aim for a finished size of roughly 13-18 cm wide and 10-15 cm tall, large enough for a mug and a small snack, small enough to finish the woven piece quickly. Two things matter when you set up your warp:
Warp slightly wider than your target finished width. Weaving tends to pull the fabric in slightly (called draw-in), so a piece warped exactly your target width will often come of the loom narrower than planned.
Leave extra unwoven warp at the top and bottom, a few centimetres beyond the woven area, so you have enough length to twine, hemstitch, or knot for finishing.
If your loom's weaving width allows it, you can warp for two mug rugs side by side. That's a simple way to make a matching pair in one sitting.
How Long Does It Take to Weave a Mug Rug?
The first time, budget 3–5 hours for warping, weaving, and finishing — that's a realistic afternoon project, not a quick half-hour craft. Once you've made a few, the same project drops to roughly 60–90 minutes, closer to a coffee-break activity. Don't be discouraged if your first mug rug takes the full afternoon; most of that time is learning the motions, not the size of the piece.
Choosing yarn: Warp, Weft and the sett
Before picking yarn, it helps to understand sett: the number of warp threads per inch (often written as EPI, ends per inch). Sett and yarn weight work together: a wider sett (around 4 ends per inch) suits a thicker yarn, while a closer sett (around 8 ends per inch) suits a lighter weight weft. Get this pairing wrong and the fabric either looks gappy (sett too wide for thin yarn) of the weft can't pack down properly (sett too close for thick yarn).
For the warp itself, cotton rug warp or cotton seine twine is the standard choice — strong, smooth, and barely stretches under tension. Cabled cotton warp from Bockens is a long-time favourite among frame loom weavers in Scandinavia, if you want to match the materials many Nordic tutorials reference.
For the weft, you have three solid options:
Cotton (worsted or aran weight) — gives a flatter, more fabric-like surface
Wool or rug wool — denser and warmer, with more visual texture
Fabric strips — a sustainable way to use up scraps, with a more rustic look.
Weft-Faced or Balanced - Which Should You Choose for a Mug Rug?
A balanced weave shows both warp and weft equally on the surface, while a weft-faced weave packs the weft down tightly enough to completely hide the warp. For a mug rug — something that will sit under a warm mug and get handled often — weft-faced is usually the better choice, because the denser structure holds up better to daily use and washing. Most generic weaving tutorials don't make this distinction explicit, but it's one of the most consequential decisions in the whole project.

Step-by-Step: Weaving Your Mug Rug
Warp your loom to your chosen width, leaving extra length top and bottom for finishing. [If you're using the Frame Loom No.1, its built-in magnet system lets you attach a pattern or graph paper to the back, so you can see your stripe or colour layout right through the warp as you go.]
Weave a plain weave base for at least the lower portion of the piece. This is your foundation and the technique most mug rug designs build on. [Read plain weave guide here]
Try doodle weaving for pattern. This is simply weaving one thread back and forth across varying numbers of warp threads to build up organic shapes. It is a low-pressure technique, great for using up yarn ends, and forgiving of "mistakes."
Finish while the piece is still on the loom. Twine the warp ends at the top and bottom using a separate length of strong yarn about three times the width of your loom — twining brings the front and back warp threads together to lock the weaving in place, and it's far easier to do under tension than after you've cut the piece off. [Read twining guide here]
Hemstitch, trim, and add fringe (optional). Once twined, you can hemstitch for an extra-clean edge, then trim, twist, or braid the remaining warp ends into a fringe.
Secure all loose ends, to make sure they don't unravel. Use a needle to hide and secure loose ends within the weaving so they stay put, see our full guide on how to secure yarn ends for the details.
Add a fabric backing (optional but recommended). Unlike a wall hanging, a mug rug sits flat on a table — a simple fabric backing stops it sliding around and hides the back of the weaving.
Common Mistakes (and How to Avoid Them)
Mistake: the piece pulls in at the sides as you weave. This "hourglass" shape happens when the weft is pulled straight across and tight, drawing the edges inward row by row. The fix is bubbling — arcing the weft up in a gentle curve before beating it down, so it has enough slack to travel over and under the warp without pulling the sides in. Even textured techniques like krokbragd tend to draw in, so this matters across the whole piece, not just the plain weave sections. [Read about how to prevent draw-ins here.]
Mistake: inconsistent selvedge wrapping. On a piece this small, every edge is visible, so always catch the outer warp thread the same way at each turn — switching technique partway along is one of the most noticeable errors on a finished mug rug.
Mistake: finishing the piece off the loom. Twining and hemstitching are dramatically easier while the warp is still under tension on the frame. Do all your finishing work before you remove the piece, not after.
Design Ideas for Your Mug Rug
Stripes or colour blocking — the easiest entry point, and a good way to practise clean colour changes.
A matching pair — warp for two mug rugs side by side and weave them in coordinating colours, perfect as a small gift set for two.
Soumak or rya accent borders — a plain weave field with a textured top or bottom band.

Want a Challenge? Try Krokbragd or Rölakan
Krokbragd and rölakan are weft-faced techniques with deep roots in Scandinavian weaving, and both are popular choices for coasters and mug rugs in their traditional forms — usually on a rigid heddle or shaft loom. Krokbragd can be adapted to a frame loom using hand pick-up instead of heddles, but it's slower and more fiddly this way, so it's worth treating as an "if you want a challenge" variation once you're comfortable with plain weave, soumak, and rya rather than a starting point.
Caring for Your Woven Mug Rug
A weft-faced mug rug made with cotton or wool can generally be hand-washed gently in cool water and laid flat to dry — avoid wringing, which can distort the shape. A fabric backing protects both the table surface and the back of the weaving from spills and heat. Because care and durability are rarely covered in weaving tutorials, it's worth deciding on a backing and washing approach before you give a mug rug as a gift, so you can pass that information along with it.
What's Next
A mug rug pulls together everything from plain weave to soumak, rya, and finishing — once you've made one, you've effectively completed the core Learn to weave technique set. From here, a krokbragd or rölakan coaster is a natural next challenge if you're ready for something slower and more advanced.


Comments